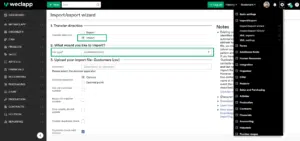
With our import/export wizard you can import your master data to weclapp via csv file. You can find the wizard under Global Settings > Import/Export > Import/Export Wizard.
► General Import/Export Wizard
► Best Practice: Things to know about importing
General Import/Export Wizard
In the import wizard you have the option of importing data into your system. Depending on the selected file type, you must use certain file templates so that the import can be carried out properly. You can find the wizard under Global Settings > Import/Export > Import/Export Wizard.
Select the transfer direction Import and the file type (import type) you want to import.

The prerequisite for a successful import is that the appropriate template for the selected type of import is used. Otherwise, an error message will be displayed if a different template is used.
Best Practice: Things to know about importing
(1) Open csv file format-free
It is not uncommon for Microsoft Excel to reformat the columns at its own discretion (Excel logic) when opening the import file (CSV) and thus render columns such as “Birthday” or “Telephone number” unusable (cell format changed). We recommend that you open the file format-free according to these instructions: Open CSV import file format-free and save as CSV (Excel)
(2) Import under Mac OSX
We assume the Windows character set ISO-8859-1. As soon as you open our demo file with Microsoft Excel for Mac, the character set is converted to a Mac-specific format. In order to ensure a successful import, you must carry out the following steps: How does the CSV master data import work under Mac OSX?
Instructions for imports
After selecting the file type in the import wizard, a PDF symbol is displayed next to the template, in which you will find detailed instructions for the respective import.
You need support with the data import? No problem – our certified partners certified partners will support you.
(1) Mandatory fields
Each import has certain fields that must be filled in. These fields are shown in capital letters in the template. Furthermore, they are marked in red in the instructions.
(2) System data
In some fields it is assumed that only values that already exist in the system can be imported. An example of this is units, currencies or distribution channels, which can only be imported if they have already been created in your basic settings.
(3) Maximum number of characters
In some columns there are certain size restrictions that must be observed. You can read the respective maximum possible character lengths in the instructions.
(4) Permitted country names
The field “Country” is a mandatory field in many imports. In this field, however, only full country names in German or English are permitted. The exact names can be found in the instructions.
(5) Additional fields
Additional fields must be transferred to the system with a separate additional attribute import. The prerequisite for this is that these have already been created in the system.
How does the import of additional fields work?
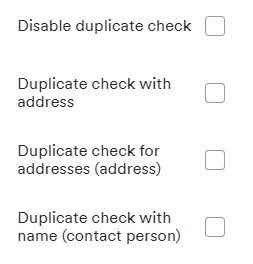
(6) Duplicate check
The wizard can be used not only to create new data, but also to update existing data. You will find the respective steps in the respective instructions.
To ensure that no new data records are created in the system during this process, the duplicate check must be used. You will find the settings for this on the respective page after selecting the import type.
(7) Error messages
If certain requirements are not met, an incorrect template was used or other errors are present, the import will not be carried out. In such a case, you will receive a detailed error message indicating exactly which line contains which error.
Thus, through these messages you have the possibility to correct the mentioned lines.
You can also watch our tutorial video on the topic of data import:
Further links
How are the different entities in the Import Wizard related?
How does the import of sales items and sources of supply work?

